
#Draw a process in the BPMN editor
The BPMN tab shows a process as a diagram, and in edit mode it adds a palette to draw with and a properties panel to configure each element.
#Read or edit
Open a process and its BPMN tab. The diagram opens Read-only: you can pan, zoom and look, but not change anything.
Click Edit in the header to change it. Only one person can edit a process at a time — see Edit without overwriting each other. When you are done, Save stores the diagram together with everything else you changed on the process, and Discard throws it all away. Both end edit mode.
#Find your way around the editor
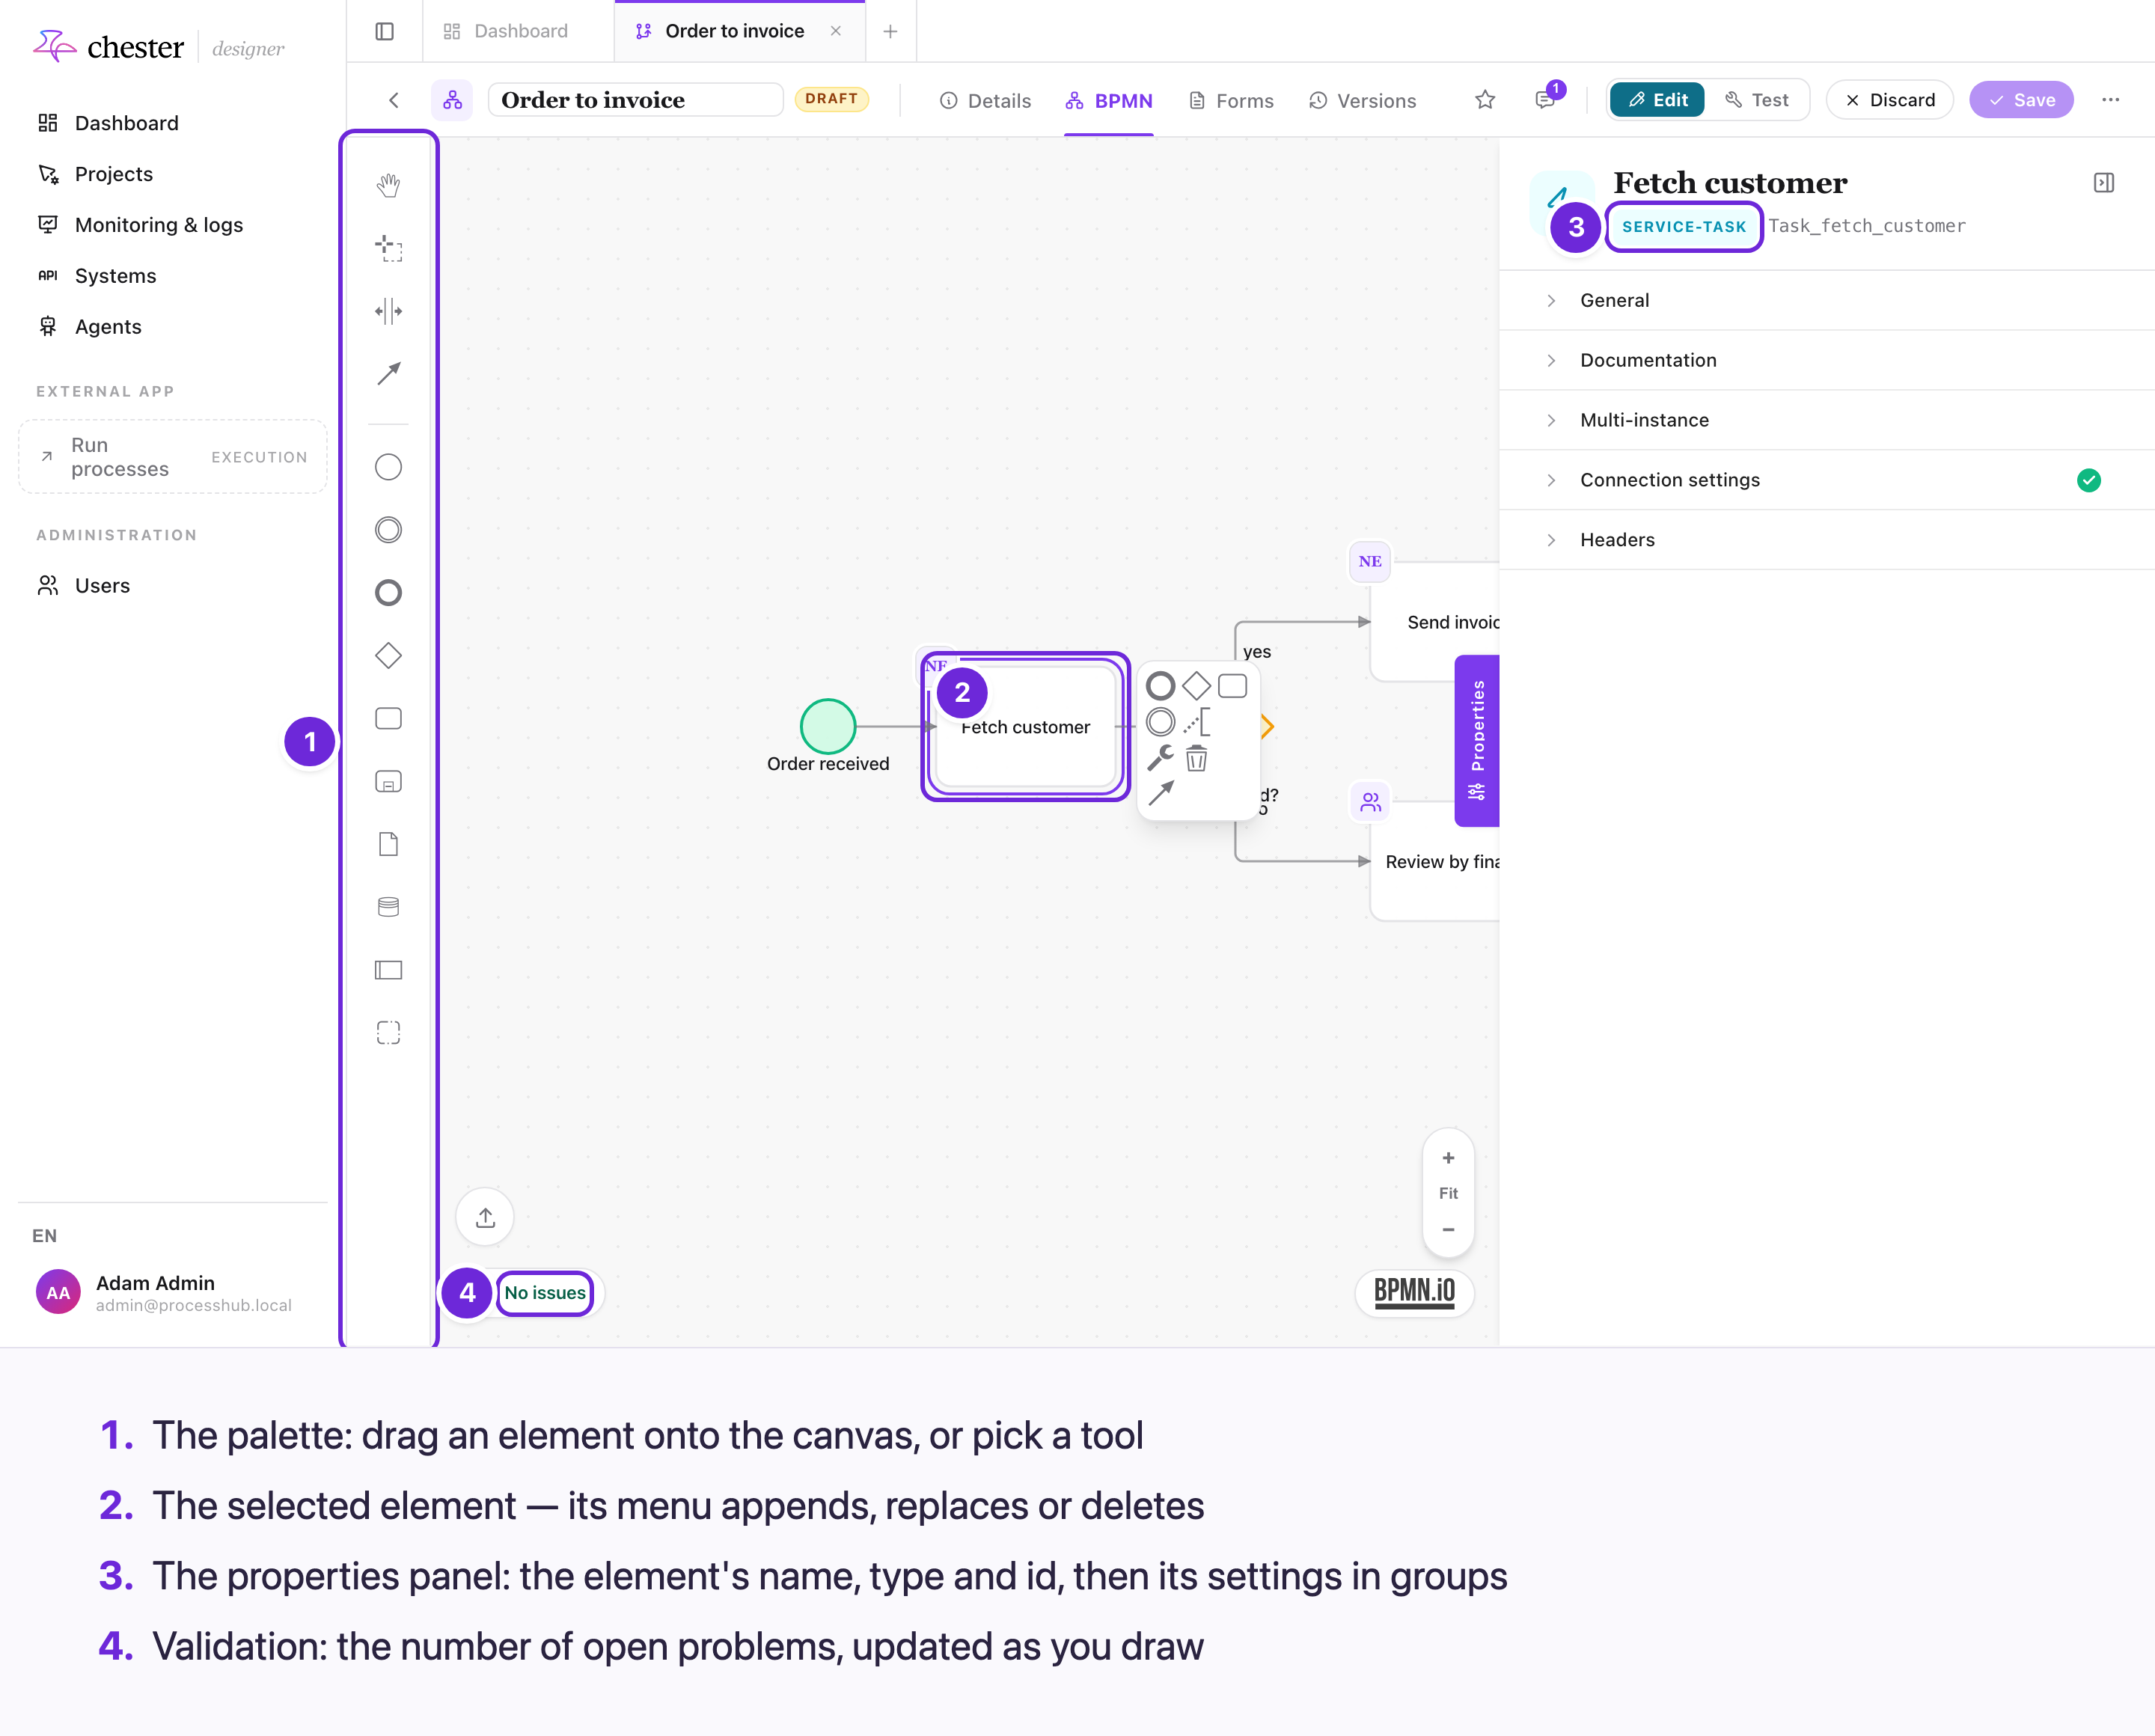
- The palette holds the tools — hand, lasso, space and connect — and the elements you can draw: events, a gateway, a task, a sub-process, data objects and stores, a pool, a group.
- The selected element gets a small menu: append the next element, connect it, change its type (the wrench), or delete it.
- The properties panel shows what the selected element does, in collapsible groups. A green tick marks a required group that is complete.
- The validation badge counts what is still missing. See Check that a process can run.
The zoom buttons at the bottom right — +, Fit, − — frame the diagram. In edit mode, a Copilot button next to Properties opens the AI assistant, if your installation has one — see Model with the Copilot.
#Draw
- Place an element: click it in the palette, then click on the canvas.
- Continue from an element: select it and pick the next element from its menu. The new element is connected for you.
- Connect two elements: use the arrow in the element's menu, or the connect tool in the palette, and click the target.
- Change what an element is — a task into a user task, a start event into a timer start event — with the wrench in its menu. The same menu switches a task to multi-instance.
- Rename an element by double-clicking it.
Not every element the palette offers can run. Elements lists which ones Chester executes; the others are flagged by validation.
#Configure an element
Select an element and open Properties in the top-right corner of the canvas. The panel follows the selection: click another element and it shows that one; click empty canvas and it asks you to select an element. Close it with the button in its header.
Which groups appear depends on the element. A service task, for example, has General, Documentation, Multi-instance, Connection settings and Headers. The elements are described one by one in Elements.
A documentation-only process shows only the documentation settings of each element — see Process master data.
#Import a diagram
In edit mode, the upload button at the bottom left of the canvas opens Upload BPMN
file. Drop a .bpmn file of up to 10 MB onto it, or browse for one. The file
replaces the current diagram.
#Try out elements
Test, next to Edit in the header, switches the canvas to test mode, where you run single elements to see what they do. See Deploying a process.
⚠️ A few controls of the editor are labelled in German whatever the language of the screen: the header's Mehr menu and the Dokumentation editor on the Details tab.